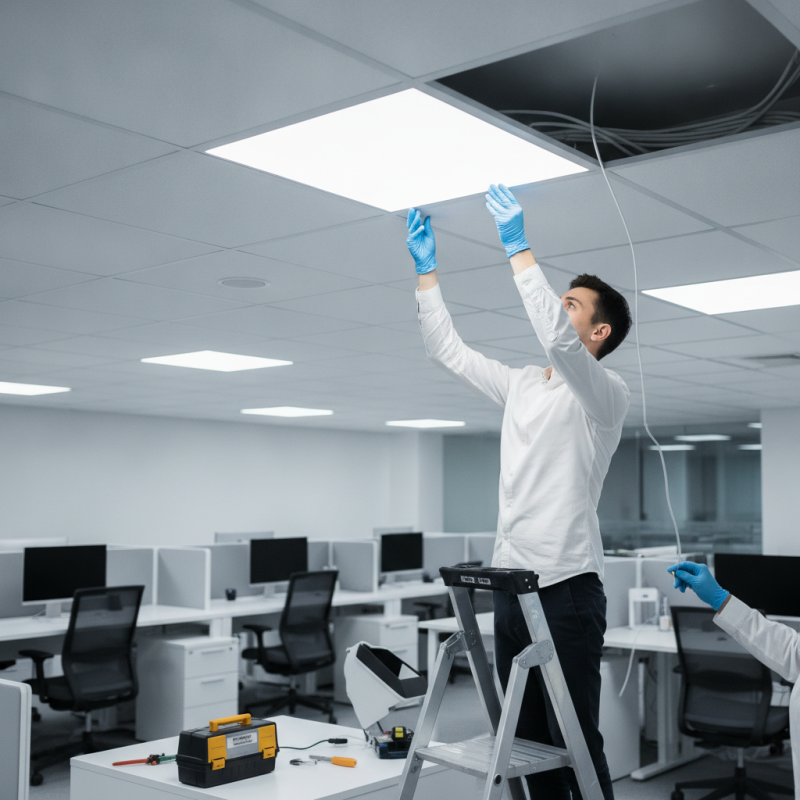
When it comes to modernizing indoor lighting, many people consider LED panel lights. As an expert in the field, John Smith, a lighting consultant with over a decade of experience, emphasizes, "Knowing how to install LED panel lights in a drop ceiling is vital for achieving optimal lighting." This guide will explore practical tips for ensuring a smooth installation process.
Installing LED panel lights in a drop ceiling can be straightforward, yet challenges may arise. Measurements need to be precise. Ensure your panels fit snugly within the grid. Overlooking the power supply is a common mistake. It’s crucial to plan the electrical layout beforehand.
Some users encounter issues with uneven lighting distribution. Testing the light output can prevent this. Patience is essential when adjusting your panels. Remember, every installation is a learning opportunity. Knowing how to install LED panel lights in a drop ceiling can transform your space, making it both functional and aesthetically pleasing.
LED panel lights are becoming increasingly popular in commercial and residential spaces. They offer a sleek and modern design while providing high-quality illumination. According to the Department of Energy, LED lighting can last up to 25 times longer than traditional bulbs, making them a cost-effective choice over time. With energy efficiency ratings often exceeding 80%, these panels significantly reduce electricity bills and environmental impact.
The lightweight nature of LED panel lights means they are easy to install in drop ceilings, creating a seamless look. They distribute light evenly, reducing dark spots and glare, which enhances visual comfort. A study from the Lighting Research Center indicates that proper lighting can improve productivity by up to 15%. However, challenges can arise during installation, such as ensuring adequate power supply and aligning panels properly. Mistakes in these areas can lead to flickering lights or inadequate illumination.
As the technology evolves, finding the right specification becomes crucial. Not every panel is suited to all environments. Factors like dimming capabilities and color temperature should be considered. Users must also reflect on the need for the right wattage to avoid overloading circuits. This attention to detail ensures not only better functionality but also longer life spans for the fixtures.
| Tip Number | Installation Tip | Benefits |
|---|---|---|
| 1 | Choose the correct size LED panel for your drop ceiling. | Ensures a snug fit and optimal lighting. |
| 2 | Use a mounting frame for easier installation. | Simplifies positioning and stability. |
| 3 | Ensure proper wiring and electrical connections. | Prevents electrical issues and ensures safety. |
| 4 | Consider using energy-efficient drivers. | Reduces energy consumption and costs. |
| 5 | Plan the layout for optimal light distribution. | Enhances brightness and ambiance. |
| 6 | Use a level tool to ensure panels are straight. | Improves aesthetic appeal and functionality. |
| 7 | Secure panels properly after installation. | Prevents falling panels and maintains safety. |
| 8 | Install dimmers for flexibility in lighting. | Allows for customizable brightness levels. |
| 9 | Regularly check for maintenance and updates. | Ensures longevity and performance of lights. |
| 10 | Consider professional installation for complex layouts. | Ensures safety and proper function. |
: You need a measuring tape, utility knife, screwdriver set, wire stripper, and safety gear.
It ensures precise placement of the lights within the ceiling grid.
Use patience and care to avoid cracks. Improper handling can cause damage.
Check for insulation and wiring issues that could affect the installation.
Conduct checks bi-annually to ensure optimal performance and longevity.
Changes in brightness, color temperature, or noticeable discoloration suggest replacement.
Use a soft cloth and gentle cleaner to avoid scratches while cleaning.
Loose connections can cause flickering lights and affect overall performance.
Yes, some tiles may require resizing to fit the panels properly.
Rushing the process can lead to incorrect installations and future issues.
This article provides a comprehensive guide on how to install LED panel lights in a drop ceiling, emphasizing the importance of understanding these lights and their benefits. It begins by outlining the necessary tools and materials for installation, ensuring that readers are well-prepared before starting the project. The detailed step-by-step instructions cover removing existing ceiling panels, making it easier to replace them with the new LED panel lights.
After the installation, the article highlights essential final checks and maintenance tips to ensure longevity and optimal performance of the lights. This guide not only simplifies the process but also empowers readers to successfully transform their drop ceilings with energy-efficient LED lighting solutions. Overall, this resource is invaluable for anyone looking to enhance their space while learning how to install LED panel lights in a drop ceiling effectively.